Recovery Tips and Timeline for Full Body Liposuction

Recovery Tips and Timeline for Full Body Liposuction

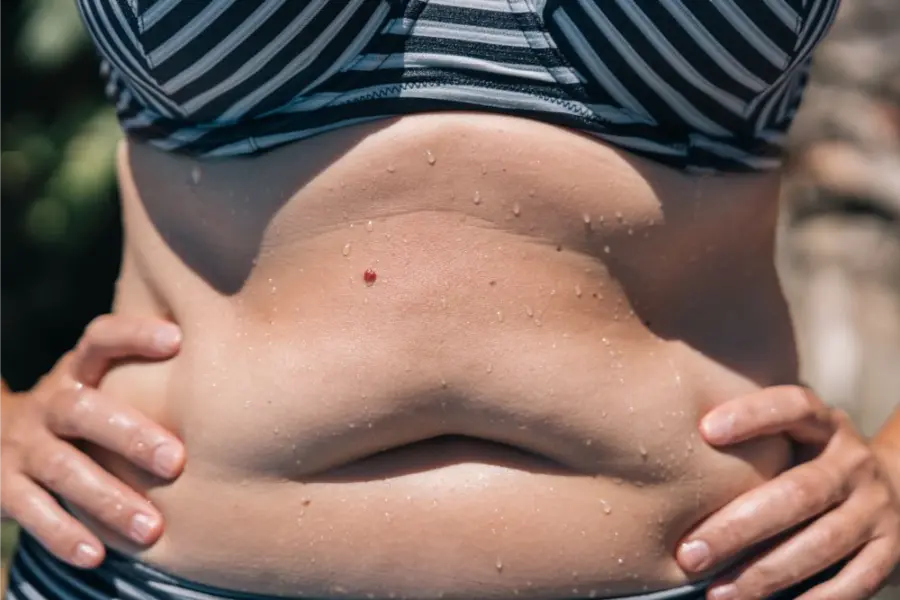
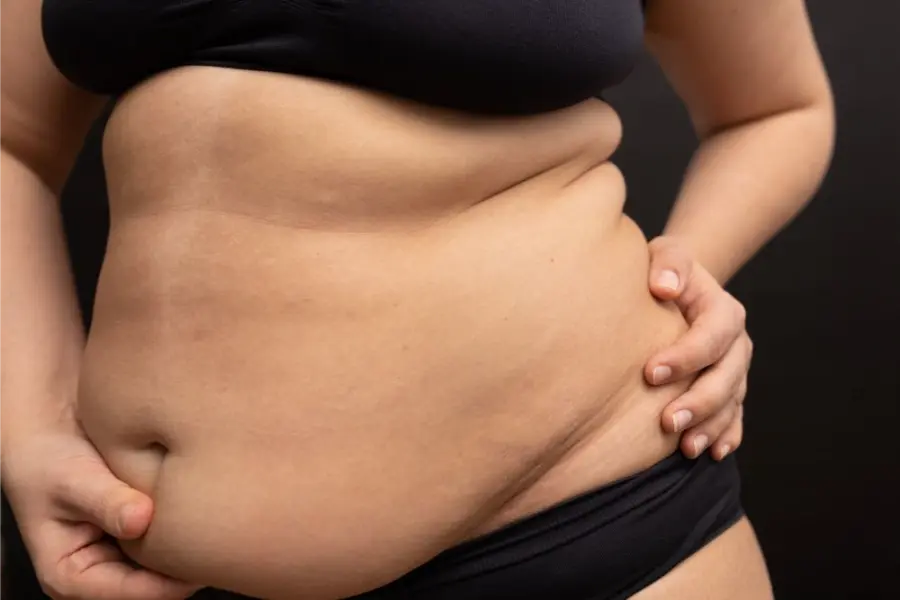
Liposuction has helped many people address stubborn fat that diet and exercise cannot target. A full-body liposuction treatment takes that idea further by targeting multiple areas in one carefully planned approach. This option works well for patients who want balanced results and clear body contouring goals. Many people choose it to remove unwanted fat and support a more defined shape. This blog will break down recovery tips and the timeline for full-body liposuction so you know what to expect. Keep reading to understand how your body heals and how you can support smoother results.

Understanding the Liposuction Procedure & Recovery Basics

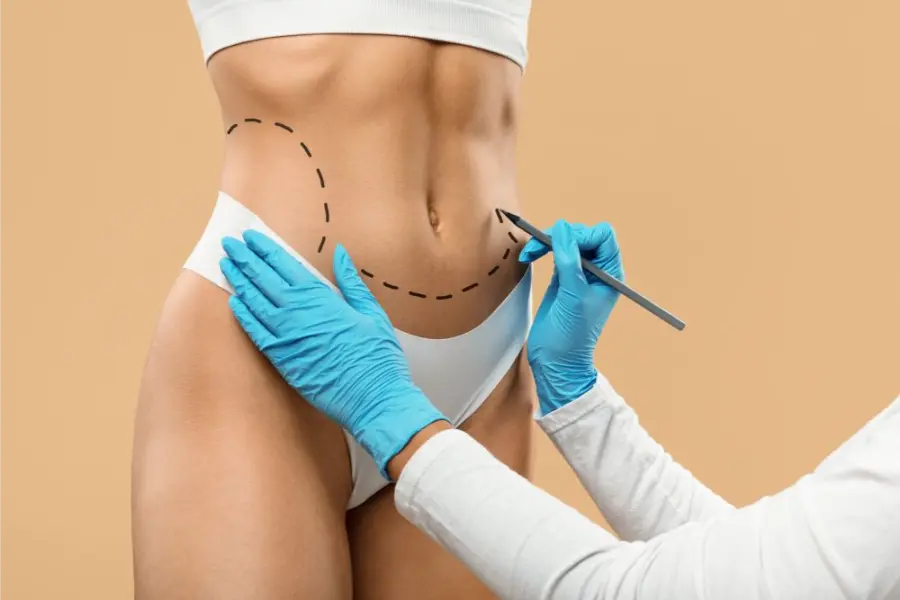
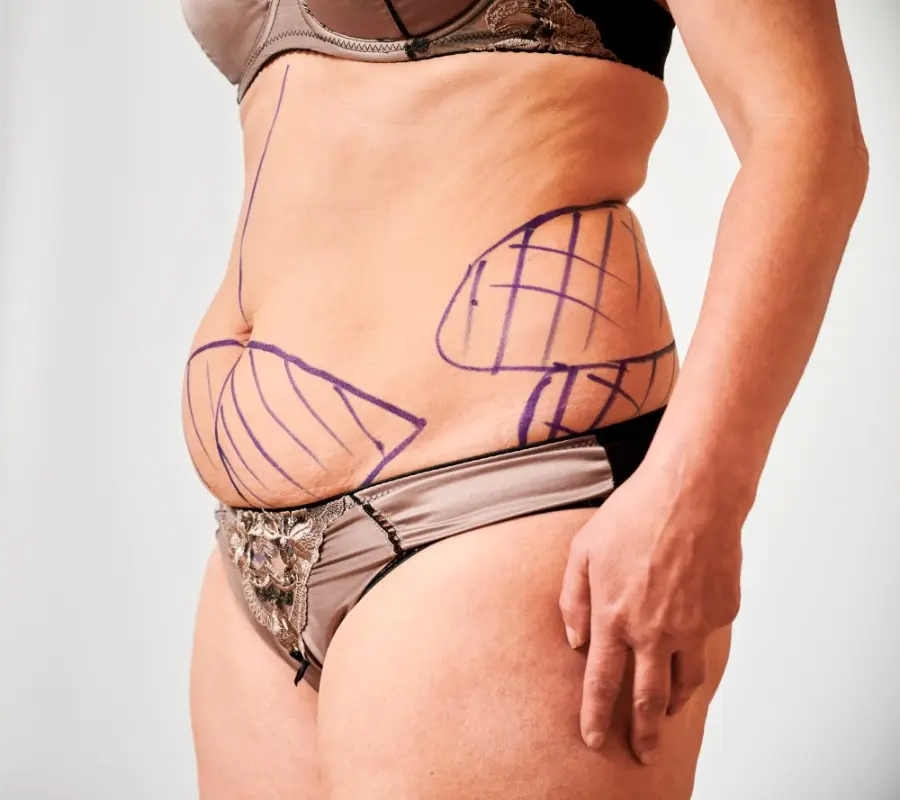
A board-certified plastic surgeon performs liposuction surgery by removing fat cells from selected areas. The surgeon focuses on areas that resist change, even with a healthy lifestyle. Full-body liposuction often combines multiple treatment areas into one surgical plan. This approach requires careful post op care.

Liposuction recovery starts as soon as the procedure ends. Your body begins tissue repair right away. Swelling and bruising appear early and signal the start of healing. Most patients feel sore, tight, and tired during the initial phase. These reactions stay normal and expected.

What is the Recovery Time for Full Body Liposuction

What to Expect in the First Week

The first week sets the tone for your entire healing journey. Significant swelling and bruising appear during this period. Fluid accumulation may also occur in the treated areas. Your surgeon usually prescribes pain medication to help manage pain. Most patients describe the discomfort as pressure rather than severe pain.

You must wear a compression garment at all times during the initial week. Proper compression supports tissues, reduces swelling, and helps the skin adapt to new contours. Gentle movement plays a key role here. Light walking and slow walking encourage circulation and reduce the risk of blood clots. You should avoid heavy lifting and any physical demands during this phase. Focus on rest, hydration, and follow your surgeon’s instructions closely.

Why Compression Garments Matter So Much

Wearing compression garments remains one of the most important recovery tips. Compression helps decrease swelling, supports skin tightening, and improves blood flow. It also helps the skin adjust to the fat cells removed during surgery.

Most surgeons recommend wearing compression garments for several weeks. Proper compression reduces fluid buildup and supports a smoother recovery. Patients who stay consistent often notice better liposuction results over time.

Managing Swelling, Bruising, & Discomfort

Swelling and bruising peak during the first few weeks. Swelling continues even when pain fades. You may notice uneven firmness or mild residual swelling in certain areas. This reaction stays normal during liposuction recovery.

You can minimize swelling by following simple habits:

  • Maintain a low-sodium diet
  • Stay hydrated
  • Avoid alcohol and eliminate toxins
  • Keep wearing compression garments

These steps encourage lymphatic drainage and support tissue healing. Many patients also benefit from guided lymphatic drainage sessions when approved by their surgeon.

How Long Does It Take to Look Normal After Liposuction

Supporting Healing Through Movement & Circulation

Movement supports healing more than complete bed rest. Gentle movement encourages circulation and improves blood flow. Light walking helps reduce swelling and lowers the risk of blood clots.

During the first few weeks, keep exercise intensity low. Avoid strenuous exercise, running, or weight training. Your body heals faster when you respect its limits. Think of movement as medicine to heal liposuction incisions.

Nutrition & Lifestyle Choices That Aid Recovery

Your recovery process depends heavily on your daily choices. A healthy diet supports tissue repair and helps the body heal. Focus on lean protein, vegetables, fruits, and whole grains. A balanced diet fuels recovery and supports skin elasticity.

Many patients ask about weight changes. Surgeons recommend maintaining a stable weight to protect results. Liposuction removes fat cells permanently, but remaining fat cells can still grow with weight gain. Healthy lifestyle habits protect your new contours.

Gradual Improvements Begin at Week 2-3

During weeks two and three, swelling slowly decreases. Bruising fades, and energy levels improve. Many patients return to desk work and light daily routines during this period.

You may still feel tightness in the treatment area. Mild residual swelling often lingers. Gentle movement and light exercise continue to support healing. Slow walks remain ideal. You should still avoid strenuous exercise and heavy lifting. Your surgeon may adjust compression garment use based on your progress.

Building Toward Normal Activity at Week 4-6

The recovery timeline reaches a turning point around four to six weeks. Most patients regain comfort with daily tasks. Swelling continues to improve, though some areas may still hold fluid.

Many surgeons allow gradual increases in exercise intensity during this stage. Light strength training and controlled movement may begin with approval. Always follow professional guidance to ensure optimal healing. Skin tightening continues as skin elasticity responds to the new shape. Patients who combine liposuction with skin tightening treatments may notice enhanced firmness during this stage.

Understanding the Role of Follow-Up Appointments

Follow-up appointments play a critical role in recovery. These visits allow your plastic surgery provider to track progress and address concerns. Your surgeon checks swelling, healing, and contour changes.

You should attend follow-up appointments as scheduled. These visits help ensure optimal healing and long-term results. Patients who stay engaged in post-op care often achieve better outcomes.

Long-Term Healing & Final Results

Final liposuction results take time. Your body heals gradually, and swelling resolves slowly. Many patients notice ongoing improvements for several months. Mild residual swelling can persist but continues to fade.

Final results usually appear once swelling fully resolves and tissues settle. New contours become more defined, and clothing often fits better. Patients who maintain a healthy lifestyle tend to enjoy lasting benefits.

Common Concerns During the Healing Process

Some patients worry about excess skin after fat removal. Skin elasticity plays a major role here. Younger patients or those with good skin tone often see better skin adaptation. Skin tightening treatments may help in some cases.

Pain levels vary, but severe pain requires immediate medical attention. Sudden swelling, redness, or shortness of breath also requires urgent evaluation due to the risk of blood clots.

Tips for a Smoother Recovery Experience

A smoother recovery depends on consistency and patience. You can support healing by:

  • Wearing compression garments as directed
  • Following pain medication instructions
  • Eating a healthy diet
  • Staying hydrated
  • Avoiding strenuous exercise too soon

These habits support tissues and help ensure optimal healing throughout the recovery timeline.

What to Expect 3 Months After Liposuction

Planning Your Full-Body Liposuction with Dr. Jim Brantner, MD

Recovering from full-body liposuction raises one question for almost every patient: how long will it really take, and am I healing the right way? Swelling, activity limits, and body changes can feel overwhelming without clear medical guidance. Dr. Jim Brantner, MD, works closely with patients to set realistic recovery timelines, manage post-procedure expectations, and support safe healing from day one.

Apart from liposuction, his practice also offers breast augmentation, cosmetic surgery consultations, and personalized post-operative care plans designed around long-term results. If you want expert oversight from consultation through recovery, schedule your consultation or contact us today and take the next step with confidence in your care.

FAQs

Choosing the right surgeon and understanding the process makes recovery easier. Below are common questions patients ask when considering care with Dr. Jim Brantner, MD.

Q1. Why should I choose Dr. Jim Brantner, MD, for liposuction surgery?

A: Dr. Jim Brantner, MD, brings extensive experience as a board-certified plastic surgeon. He focuses on patient safety, detailed planning, and natural-looking body contouring results.

Q2. How does Dr. Brantner guide patients through liposuction recovery?

A: Dr. Brantner provides clear post op instructions, structured recovery plans, and consistent follow-up appointments to support optimal healing and long-term results.

Q3. What body contouring procedures can Dr. Brantner combine with liposuction?

A: Dr. Brantner may combine liposuction with skin tightening or other body contouring procedures when appropriate. He tailors each plan to individual body contouring goals.

Q4. How long does recovery take under Dr. Brantner’s care?

A: Most patients recover within four to six weeks, though healing varies. Dr. Brantner monitors progress closely and adjusts guidance to support each patient’s healing journey.

Q5. How can I maintain my final liposuction results long-term?

A: Dr. Brantner encourages a healthy lifestyle, a balanced diet, and a stable weight to protect final liposuction results and maintain new contours over time.

How To Get The Best Results From Fake Eyelashes

How To Get The Best Results From Fake Eyelashes

Whether you are a professional or a first-time user, applying fake eyelashes needs some practice to get it just right. If the application is not perfect, it can look too obvious or over the top for most people’s taste. Makeup artists from all across Hollywood have worked hard to perfect this look and have made it into their signature style of application. They have learned the tricks to apply fake eyelashes correctly.

The most common mistake people tend to make is applying too many individual lashes for a less noticeable effect, or they may end up having gaps in between each lash strip that shows the natural eyelash underneath. Today, we are going to discuss how you can get the best results for your fake eyelashes so you can avoid these common mistakes.

Go Get Those Lashes!

First things first, let’s go and get a good set of strips or clusters for your eyes. I would recommend that you try getting the individual extensions as they are less tacky than the strip ones. If you have already purchased lash sets with glue and did not like them, then you can apply these glue-less ones instead. Here are some tips for applying fake eyelashes on your own.

Note: Be sure to remove your makeup and clean off with a makeup remover before taking care of your lashes.

  • Apply the adhesive only along the eyeliner, as shown in the video above. This is to avoid a messy-looking application and also making sure that your glue does not seep out of the lash cluster and onto your eyelid, which can look unsightly.
  • Peel off the first lash that you wish to apply from its plastic covering and press down lightly on the fake lashes’ base (the strip of the lash) along your natural lash line. Just like above in the video, only apply the glue on your base and press them against your natural lashes. Do not apply any adhesive near your outer eyelid as you will need to work with it later.
  • Using a clean mascara wand or cotton bud, curl up against each individual lash. This can help you to avoid clumping them together, which may not look as natural and pretty as you would like it to be on your eyes.
  • Now comes the time where you can decide whether to leave the eyelash extensions just as they are or add a bit of mascara for extra volume and length before applying the next lash. Remember to choose a similar color that matches your natural lashes. I would recommend doing it this way for the first set of eyelashes, and then you can go on to apply another different colored mascara if you wish or even use false lashes without adding any mascara at all. Just stick with one style of application as you feel most comfortable working with it, especially if it is your first time.
  • Apply the next lash along your natural lashes, but remember to apply only the glue on its base as you did before (not near your inner-eye corner). Repeat steps 3 and 4 until all of the lashes are applied to both eyes.
  • If you wish for a more dramatic look, you can go on to apply false lashes and keep them for a couple of days or longer without cleaning the glue. This is because it is easier to remove the lashes from your eyes if you have applied some mascara onto them first. To avoid getting the mascara all over your face, nose, and cheek areas before applying your next lash set, remember to close your eyes tightly when you are washing off the mascara with a clean makeup remover.

Conclusion

There you go! You should now be able to apply fake eyelashes like a pro and also avoid ending up looking like a clown. Just remember to choose the right kind of lashes for you, whether it is for an extravagant night out or just to change your look on any other day.

If fake eyelashes don’t work for you, Dr. Jim Brantner MD. can help you with cosmetic surgery. Get in touch with us today!

Tips on How to Cover up Appearance & Minimalize Effects of Melasma

Tips on How to Cover up Appearance & Minimalize Effects of Melasma

If you have been diagnosed with Melasma through one or more tests, it’s important not to ignore the problem any longer because it can only be effectively treated by addressing its underlying cause and not just covering up the physical aspect of this condition. Here are some simple tips on what steps may help minimize the negative impact of Melasma on your life:

Tip One: avoid wearing dark makeup. Try to keep it light and try not to use a lot of hard makeup on the affected areas.

Tip Two: try using concealer or foundation over the affected area instead of simply applying powder to it. This will hide the affected area a little bit and you can easily cover it with a little light makeup.

Tip Three: wear sunscreen every day, even during winter months when sun exposure is minimal; Melasma can only be effectively treated by addressing its underlying cause and not just covering up the physical aspect of the problem. Also wear sunscreen every day regardless of where in the world you live.

“You might be wondering how products differ from one another on the market today. Keep in mind that there are many different brands offering various formulations for sun protection to choose from based on your personal needs.”

Tip Four: ask your doctor about using topical or oral medication to control the pigment; these are safe and effective treatments with few side effects, but they may not be suitable for everyone.

Tip Five: try minimizing stress levels by finding an activity you enjoy doing that takes up a lot of time in order to reduce the amount of time spent worrying or stressing out.

Tip Six: Look for special ingredients in the skincare products you buy, especially if they are expensive. You don’t want to buy products that cost a hefty amount and then you can’t even use them.

Tip Seven: try to find a skin-care regimen that is specifically designed for melasma sufferers. There are many products on the market that can help to minimize brown patches and even skin tone.

Tip Eight: Avoid the use of certain cosmetics as they can cause irritation which may lead to increased redness or sensitivity around the affected area. Always check the product description and ingredients before buying it. We might even go further to suggest that ask your doctor before purchasing high end products. Additionally, if you’re looking for something more affordable than some high-end brand names offer, then it’s worth checking out any review sites carefully before making an investment in this area

Bottom Line

Melasma is a disease that one has to really learn how to live with. There’s no cure, but there are ways you can treat it so the symptoms don’t get worse and your skin doesn’t look as bad. Dr. Jim Brantner specializes in treating melasma at his clinic in Tennessee and he would be happy to answer any of your questions about what treatments might work best for you or if surgery may be an option for you. Get in touch today!

You Are Fearfully and Wonderfully Made!

You Are Fearfully and Wonderfully Made!

Valentine’s Day encourages us to love the people in our lives. But how well do we love ourselves? The flaws we accept (or even love) in our spouses, friends, and family are often hard to accept in ourselves. This Valentine’s Day, we’re focusing on loving the you you are. After all, you are fearfully and wonderfully made!

Love Yourself This Valentine’s Day

  • happy woman in winterReal beauty isn’t about symmetry or weight or makeup; it’s about looking life right in the face and seeing all its magnificence reflected in your own.” — Valerie Monroe
  • How I feel about myself is more important than how I look. Feeling confident, being comfortable in your skin – that’s what really makes you beautiful. — Bobbi Brown
  • As a child, I never heard one woman say to me, “I love my body.” Not my mother, my elder sister, my best friend. No one woman has ever said, “I am so proud of my body.” So I make sure to say it to [my daughter], because a positive physical outlook has to start at an early age. — Kate Winslet
  • By choosing healthy over skinny you are choosing self-love over self-judgment. You are beautiful! — Steve Maraboli
  • Your body loves you. Your body works hard to keep you alive. — Lisa Consiglio Ryan
  • The human body is the best work of art. — Jess C. Scott
  • True beauty is not related to what color your hair is or what color your eyes are. True beauty is about who you are as a human being, your principles, your moral compass. — Ellen DeGeneres
  • People often say that beauty is in the eye of the beholder, and I say that the most liberating thing about beauty is realizing you are the beholder. — Salma Hayek
  • “You are altogether beautiful, my darling; there is no flaw in you.” — Song of Songs 4:7 NIV

Happy Valentine’s Day from Dr. Brantner’s office!

Is Vaping as Bad as Smoking?

Is Vaping as Bad as Smoking?

Cigarettes and surgery are longtime foes. Surgery seeks to improve the patient’s health and appearance through reconstructive or elective procedures, while cigarettes lead to aging, healing complications and, in some cases, cancer. But what are the risks and benefits of the mediator between smokers and healthcare professionals: vaping?

What Is Vaping?

woman exhaling smokeThe use of e-cigarettes, more commonly known as “vaping,” is becoming increasingly popular in response to the proven negative effects of traditional smoking. Vapers inhale a flavored vapor that contains a lower nicotine content than old school cigarettes. Vaping also removes smoke inhalation from the equation. While it’s not as healthy as abstaining altogether, vaping involves fewer health risks than smoking tobacco. And e-cigarettes can also help smokers quit, allowing their bodies adjust to lower levels of nicotine.

Vaping and Plastic Surgery

When smoking and surgery mix, they put the life of the patient at risk. Smoking can lead to serious complications, both during surgery and during the healing process. Does vaping have the same risks, or is vaping before surgery acceptable?

As they seek more information about the health risks of vaping, the FDA has placed it on par with tobacco use. Medical researchers are still analyzing the long term effects of vaping on the body. But one thing is clear: because of the nicotine content, vaping may cause vasoconstriction (reduced blood flow), which can lead to skin flap failure in surgical procedures. Doctors recommend vapers follow the same rules as traditional smokers before a procedure: stop vaping 4-6 weeks before surgery (or at the recommendation of your doctor).

Are you considering cosmetic surgery in East Tennessee? Call Plastic and Reconstructive Surgery to schedule a consultation.

How to Survive the Holidays (and Still Look Good)

How to Survive the Holidays (and Still Look Good)

What do Thanksgiving, Christmas, and New Year’s have in common? They’re all holidays, they’re all about spending time with loved ones, and they usually involve loss of sleep + overeating. So how can you fully enjoy the holidays without dragging for weeks afterwards? Follow our healthy holidays survival guide.

How to Survive the Holidays (and Feel Great)

  • smiling coupleMoisturize. We’ve had a long, warm autumn, but Old Man Winter has finally gotten ahold of East Tennessee. Keep your skin looking and feeling good by applying moisturizer twice a day. And remember: stepping into a warm house may feel like a hug from home, but it dries out your skin. Help your skin stay supple and smooth by moisturizing when you get home at the end of the day.
  • Get moving. There’s still time to sign up for the Turkey Trot (and you can even walk it!). Prefer to get an early start on cooking? Take a breather (and spend time with loved ones) with a family stroll around the neighborhood. Just make sure someone stays home in case the potatoes boil over (football fans are great for this job!).
  • Indulge (but not too much). There’s nothing wrong with enjoying juicy turkey, buttery mashed potatoes, and crisp apple pie—in moderation. Indulge in your favorite treats this Thanksgiving, but eat slowly to prevent overeating. You won’t only look better in the morning, you’ll feel better, too.
  • Feel the love. It’s a scientifically proven fact: hugs are good for the soul. So go ahead and hug your kids, snuggle up on the couch with your spouse, and cuddle your new grandbaby. God blessed you with an amazing family (and He’ll keep on blessing you).

Happy Thanksgiving from your friends at Dr. Brantner’s office!